
Tile Roof Solar Installation: What Homeowners Must Know
Learn the essential steps for a successful tile roof solar installation, from choosing the right mounting system to avoiding costly mistakes.

By Liam Parker
Learn more about Solar Panel Installation and Repair for guides, costs, and what to expect.
Compare Solar Panel Installation and Repair Pros Near You

Enter your ZIP code to compare top-rated local professionals and request free quotes.
Tile roofs are a hallmark of many American homes, especially in sun-rich states like Florida, Texas, and Arizona. Their classic look and durability make them a desirable feature. However, when it comes to going solar, tile roofs present unique challenges and opportunities. A tile roof solar installation is not a simple bolt-on process. It requires specific techniques, specialized mounting hardware, and a deep understanding of how to protect your roof's integrity while maximizing energy production. This guide walks you through everything you need to know, from the initial assessment to the final connection, so you can approach your project with confidence and avoid costly mistakes.
For homeowners with tile roofs, the decision to install solar is often met with hesitation. Concerns about leaks, cracked tiles, and the overall complexity are valid. But with the right installer and a clear plan, a tile roof can be an excellent host for a solar array. The key is to work with professionals who have proven experience with this specific roofing material. This article will provide the knowledge you need to ask the right questions, understand the process, and ensure your tile roof solar installation is done right, protecting both your home and your investment.
Why Tile Roofs Require Specialized Solar Installation
Unlike asphalt shingles, which are flexible and easy to penetrate, tile roofs are rigid and brittle. Whether you have clay, concrete, or slate tiles, each piece is susceptible to cracking if not handled properly. Standard solar mounting systems designed for shingle roofs are not suitable. They can put uneven pressure on tiles, leading to breakage and future leaks. A proper tile roof solar installation uses a system that works with the roof's structure, not against it.
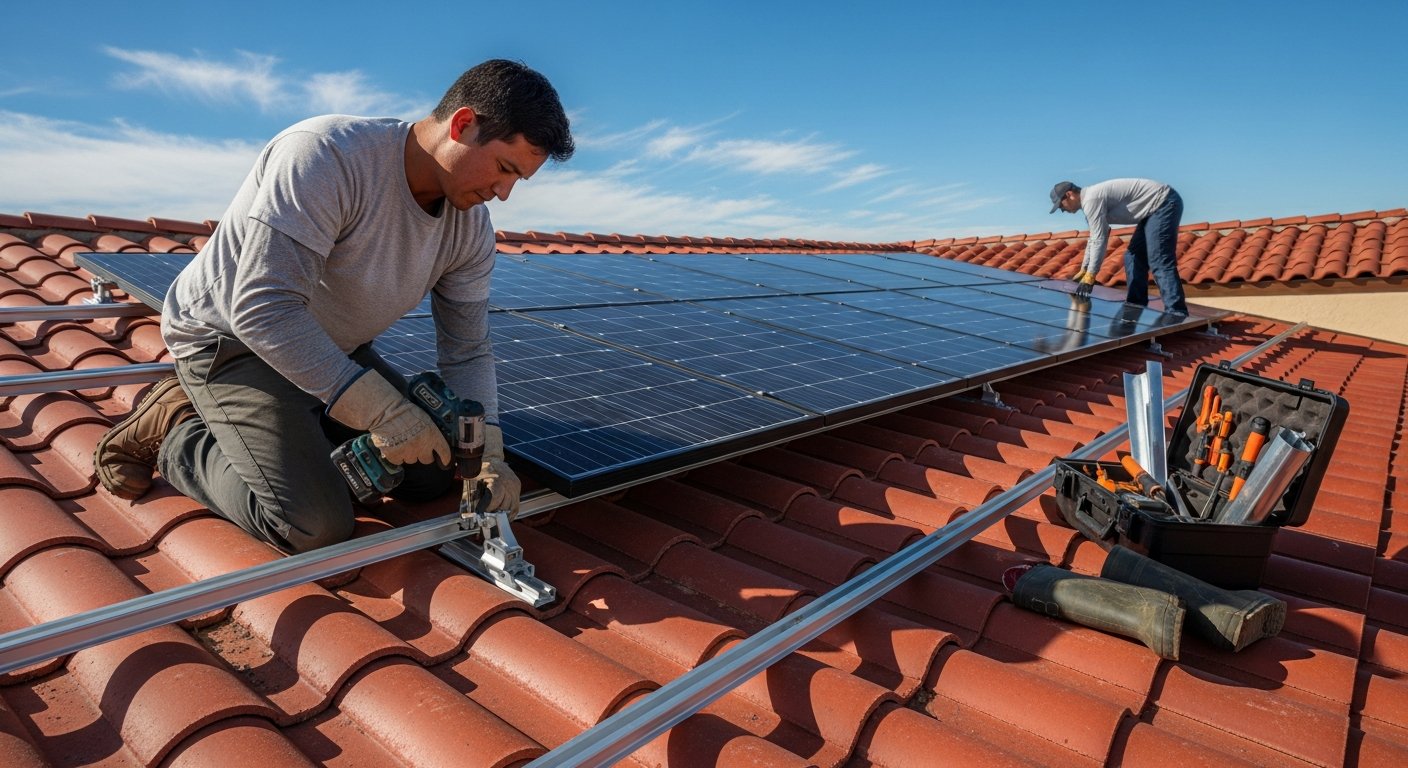
The two primary methods for mounting solar panels on tile roofs are rafter-mounted systems and tile replacement mounts. Rafter-mounted systems involve removing a few tiles in the mounting area, flashing the exposed roof deck, and attaching a metal bracket directly to the rafters. This provides a rock-solid anchor. Tile replacement mounts use a single, integrated bracket that replaces one tile, creating a low-profile and weather-tight solution. Both methods are effective, but they require precise installation to maintain the roof's waterproofing and aesthetic appeal.
Another critical aspect is the roof's age and condition. Before any solar panel is lifted, a thorough roof inspection is essential. You need to know if your tiles are in good shape, if the underlayment (the waterproof layer beneath the tiles) is sound, and if the rafters can support the additional weight of the solar system. A reputable solar installer will perform this assessment and provide a detailed report. This step can save you from significant headaches down the road, as addressing roof issues before installation is far easier and cheaper than fixing them after the fact.
Key Steps in a Tile Roof Solar Installation
Understanding the installation process helps demystify the project and sets clear expectations. Here is a general overview of what you can expect during a professional tile roof solar installation. The exact steps can vary based on the installer and your roof's specific characteristics, but this framework provides a solid baseline.
- Site Assessment and Roof Inspection: The installer evaluates your roof's structure, tile condition, and sunlight exposure. They will also review your electrical panel and assess your energy needs.
- Design and Permitting: A custom solar array design is created for your roof. This includes the panel layout, electrical plan, and necessary permits. The installer handles the paperwork with your local jurisdiction.
- Tile Removal and Flashing: In the designated mounting areas, the installer carefully removes the tiles. They then install a flashing system over the exposed roof deck to prevent water intrusion.
- Mounting System Installation: The mounting brackets are securely attached to your rafters. This is the structural backbone of your solar system.
- Panel Placement and Wiring: Solar panels are lifted onto the roof, secured to the mounts, and wired together. The wiring is run to a central inverter location.
- Electrical Connection: The system is connected to your home's electrical panel and the utility grid. This step must be performed by a licensed electrician.
- Final Inspection and Activation: A local inspector verifies the installation meets all codes. Once approved, your system is turned on and starts generating power.
Each of these steps requires a high level of skill and attention to detail. For example, during the tile removal phase, the installer must not only remove the tiles without breaking them but also store them safely for reinstallation. The flashing must be installed perfectly to ensure no leaks for the life of the system. This is why choosing an experienced installer is non-negotiable for a tile roof solar installation.
Choosing the Right Mounting System for Your Tile Roof
Not all mounting systems are created equal, and the choice can significantly impact the long-term performance and safety of your solar installation. There are two main types of mounting systems used on tile roofs: direct-attach and standoff systems. Direct-attach systems, which include the tile replacement mounts mentioned earlier, sit flush with the roof surface. They are aesthetically pleasing and offer excellent wind resistance. Standoff systems, on the other hand, use a raised metal bracket that creates a gap between the panel and the roof, allowing for better airflow and cooling.
The best choice depends on several factors, including your roof's pitch, the type of tile, and your local climate. For instance, in hot climates, a standoff system can help keep panels cooler, which improves their efficiency. In areas prone to high winds, a direct-attach system with a lower profile might be more secure. A qualified installer will recommend the best system for your specific situation. They should be able to explain the pros and cons of each and provide a clear rationale for their recommendation.
Regardless of the system, the quality of the mounting hardware is critical. Look for products that are made from corrosion-resistant materials, such as stainless steel or aluminum. The flashing, which is the piece that prevents water from getting into your roof, should be specifically designed for the type of tile you have. Using a one-size-fits-all approach is a recipe for trouble. Always ask your installer about the specific brands and models of mounting hardware they plan to use, and do a quick online search to verify their reputation.
Common Mistakes to Avoid with Tile Roof Solar
Many homeowners have been burned by poorly executed solar installations on tile roofs. The consequences can range from ugly, broken tiles to serious water damage. By being aware of the most common mistakes, you can protect yourself and ensure a smooth tile roof solar installation.
- Using an inexperienced installer: This is the biggest risk. Some general roofing or electrical contractors may offer solar installation without the specific expertise for tile roofs. Always ask for proof of experience with tile roofs and check their references.
- Not replacing the underlayment: The underlayment is your roof's last line of defense against water. If it is old or damaged, it should be replaced before the solar panels go on. Skipping this step can lead to leaks that are nearly impossible to locate after the panels are installed.
- Improper flashing: Flashing that is not correctly integrated with the tile can cause leaks. It must be installed with the right sealant and layered correctly to direct water away from the roof deck.
- Drilling into the tiles instead of the rafters: This is a critical error. Mounting brackets must be secured to the structural framing of your roof, not just the tiles. Drilling into the tiles alone offers no structural support and will inevitably lead to cracking and failure.
Avoiding these pitfalls starts with thorough research and due diligence. When you get quotes from solar companies, ask about their specific experience with tile roofs. Request a detailed plan of how they will manage the tile removal and reinstallation. A good installer will have a clear process and be happy to answer your questions. You might also find it helpful to compare solar installation quotes to see how different companies approach the job. This can give you valuable insight into their level of expertise and professionalism.
The Importance of Roof Condition and Warranty
Your roof is the foundation of your solar system. If it is not in good shape, your solar panels will not perform as expected, and you could face expensive repairs. Before any work begins, you need to know the age and condition of your roof. If your roof is nearing the end of its expected lifespan (for tile, this can be 50 years or more, but the underlayment may need replacement sooner), it is wise to address any issues before installing solar. This is your chance to upgrade your roof and ensure it can support your solar investment for decades to come.
Warranties are another crucial consideration. Your solar installer should offer a workmanship warranty that covers the installation itself, typically for 10 to 25 years. The solar panels and inverter will also have their own warranties. More importantly, you should understand how your roof warranty interacts with your solar installation. Many roof manufacturers require that solar installations be done by certified installers to maintain the roof's warranty. If the installation is not done correctly, your roof warranty could be voided. Make sure your installer is certified by your roof manufacturer if such a certification exists.
To protect your investment, you should also document the condition of your roof before installation. Take photos of any existing cracks or damage. This provides a baseline and can help resolve any disputes if new damage appears during the installation. A professional installer will also document the process and provide you with a detailed final report. Remember that the integrity of your roof is paramount. A solar system that leaks is a major problem, so investing in a quality installation is the best way to avoid future issues.
Financial Benefits and Incentives for Tile Roof Solar
One of the main reasons homeowners choose to go solar is the financial benefit. A tile roof solar installation can dramatically reduce or even eliminate your monthly electricity bills. The savings depend on your energy consumption, the size of your system, and your local utility rates. In many states with high electricity costs, the payback period for a solar system is now less than 10 years. Over the 25- to 30-year lifespan of the panels, the cumulative savings can be substantial, often exceeding tens of thousands of dollars.
Beyond the ongoing savings, there are also significant upfront incentives. The federal solar tax credit (the Investment Tax Credit, or ITC) allows you to deduct a significant percentage of your solar installation costs from your federal taxes. Many states and local utilities also offer rebates, performance-based incentives, or net metering programs, which credit you for the excess power your system sends back to the grid. These incentives can significantly lower the net cost of your system, making solar more accessible than ever. It is essential to research the specific incentives available in your area, as they can change frequently.
To maximize your financial return, it is crucial to work with a reputable installer who can help you navigate these incentives. They should be able to provide an accurate cost estimate and a projected savings analysis. If you are planning to finance your system, be sure to compare loan terms from multiple lenders. For a clear picture of your potential savings and to get started on the right foot, you can learn about the essential documents for solar installation to ensure you have everything in order for the financial side of the project.
How to Choose the Right Solar Installer for Your Tile Roof
Selecting the right solar installer is the most important decision you will make in your solar journey. For a tile roof, this is even more critical. You need a team that has a proven track record with this specific roofing material. Start by asking for recommendations from friends, family, or neighbors who have tile roofs and solar panels. Online reviews on platforms like Google and Yelp can also provide valuable insights, but be sure to read them critically and look for patterns.
When you interview potential installers, ask specific questions about their experience with tile roofs. How many tile roof projects have they completed? Can they provide references from those projects? Do they use specialized mounting systems? What is their process for handling tile removal and replacement? A confident and experienced installer will have clear, detailed answers to these questions. They should also be able to provide you with a thorough written proposal that outlines the scope of work, the equipment to be used, and a clear timeline.
It is also wise to get multiple quotes. This will give you a sense of the market rate for your project and allow you to compare approaches. However, do not choose an installer based on price alone. The lowest bid may not include the necessary expertise or quality materials. Look for a balance of competitive pricing, strong warranties, and a demonstrated ability to handle the unique challenges of a tile roof. To help you with this process, you can understand the timeline for solar installation, which will help you plan and set realistic expectations for the project.
Making the decision to go solar is a big step, especially when you have a tile roof. The potential savings, the increased home value, and the environmental benefits are all compelling reasons to move forward. The key to a successful project is preparation. By understanding the technical nuances of tile roof solar installation, you can avoid common pitfalls and ensure that your investment pays off for decades to come. With the right team and a clear plan, you can enjoy the benefits of clean, renewable energy without compromising the integrity or beauty of your home. Take the time to research, ask questions, and choose a partner you can trust, and you will be well on your way to a brighter, more sustainable future.